Samba Sharing in XBMCbuntu

Samba is not included with XBMCbuntu (at least in 11.10), so first we have to install it:
sudo apt-get install samba
Open Samba’s configuration file in an editor
sudo nano /etc/samba/smb.conf
Scroll down to the bottom of the file and add the following sections, which will create a public share with read/write access without password validation:

[global]
workgroup = Workgroup
netbios name = XBMC
server string = XBMC Server
log file = /var/log/samba/log.%m
max log size = 50
map to guest = bad user
socket options = TCP_NODELAY SO_RCVBUF=8192 SO_SNDBUF=8192
local master = no
dns proxy = no


[public]
path = /media
public = yes
only guest = yes
writable = yes
force user = xbmc

The above configuration example shares everything under the /media directory in a folder called “public”. The “force user” property must be set to a user with write access to the directory being shared. All files and directories will appear to have been created by this user.
Run “testparm” to check if your Samba configuration is parseable. For configuration changes to take effect, the Samba daemon can be restarted with
sudo /etc/init.d/smbd restart
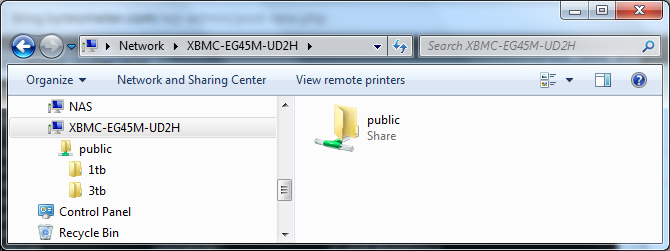
The following screenshot shows my XBMC box sharing the /media directory which contains mount points for two harddrives (ingeniously named according to their capacities…):

DD-WRT on Linksys E2000

These are the steps I took to flash a Linksys E2000 router with a DD-WRT firmware.

Background information

http://www.dd-wrt.com/wiki/index.php/Linksys_E2000
http://www.dd-wrt.com/wiki/index.php/Installation

Steps Taken

– 30/30/30 Reset
– Upload dd-wrt.v24-18024_NEWD-2_K2.6_mini-e2000.bin via Linksys firmware upgrade page from ftp://ftp.dd-wrt.com/others/eko/BrainSlayer-V24-preSP2/2011/12-20-11-r18024/broadcom_K26/
– Wait 5 minutes after upload completed.
– Web interface for DD WRT appears.
– Do a 30/30/30 reset again.
– Wireless > Advanced Settings enter 50 in the Tx Power entry. This should make for less Tx/Rx Errors and help the unit run cooler.

General:

– Initital DD WRT firmware flash must be a trailed build. A trailed build has “*e2000.bin” in its name. Following flashes must have “*e2k-e3k.bin” in their name.

Linux Commands

find

Find all files from current directory and subdirectories
find . -name '*.doc' -print
Result
report.doc
somedoc.doc

Finding files by date: http://www.cyberciti.biz/faq/howto-finding-files-by-date/

du

Show total disk usage of a directory:

du -sh /tmp/somedir

Computer Forensics

The tools I use for computer forensics.

Windows

  • Recuva – Excellent at recovering data from Windows partitions and free to boot.
  • UFS Explorer – Not free, but is able to recover from linux partitions (Recuva is better for FAT/NTFS)
  • explore2fs – Access linux partitions from Windows. Free.
  • HFSExplorer – Access Mac partitions from Windows

Linux

  • Hiren’s Boot CD – Contains an impressive lineup of programs for computer forensics, but its legal status is often debated.
  • Trinity Rescue Kit – A live distro with backup programs, Midnight Commander, testdisk, shell and other good stuff. Legal!

Harddisk Spindown on TS-239 Pro II

It is possible to configure the harddisks to spin down after a period of inactivity, but if one or more processes keep reading and writing from the disks, that will prevent them from entering standby mode.
To find out which processes are causing disk activity, the following script is very useful:
blkdevMonitor.sh
The script works like this:

  • A standby signal is sent to the disk.
  • Wait until a process wakes up the disk and then prints out name of that process.
  • Repeat.

The following link contains a list of daemons and configurations known to cause random disk activity: Standby Mode FAQ
Older versions of Squeezebox Server caused lots of disk activity, but fortunately that has been resolved in version 7.5.1.
What is jdb2 and flush?
Sometimes the processes “jbd2” and “flush” are waking up the harddisk. As I understand, these processes are responsible for doing delayed writes to the disk in order to optimize performance. In other words, they are writing to the disk on behalf of other processes which makes it difficult to find the culprit(s). In my case, it was the samba daemon accessing the disk. As long as a PC or media streamer on your network has an open view on any of your samba shares, it will cause the disks to wake up.

Formatting a USB drive from a TS-239 Pro II

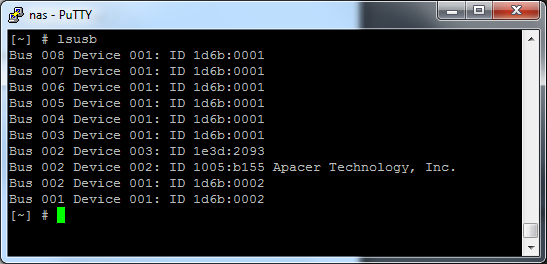
Plug the USB stick into the Qnap. Then in a terminal, as root, do an lsusb to confirm that the USB drive has been recognised.

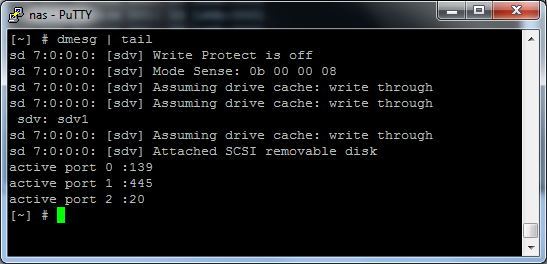
To find out what device name it has been assigned, do a dmesg | tail. This will print the latest lines from the kernel log, which should contain information about the inserted USB drive:

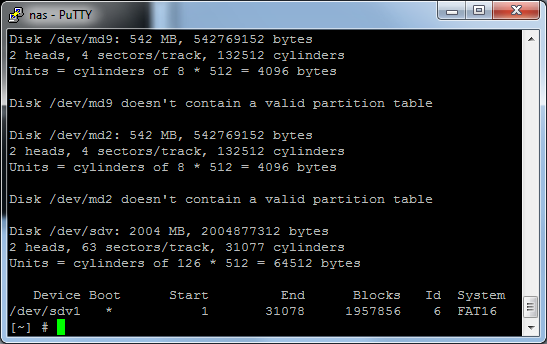
fdisk -l, which shows all connected drives, can also be used to find the right device name. The USB drive can be recognised by its size. In this case, it is a 2 GB one:
output from fdisk -l
If the USB drive is already formatted with e.g. NTFS, it has probably been mounted automatically, in which case it should be unmounted. You can check this with the df command:
df
Once we know the name of the drive and it is unmounted, we can create a new linux partition using fdisk:

  • If for example the device is sdv1, do an fdisk /dev/sdv1
  • type d to delete any existing partitions.
  • Type n to create a new partition.
  • Make it primary and first
  • Go with the defaults when prompted for start and end cylinder
  • Press t to change the filesystem to linux (number 83)
  • Type w to write the changes to the disk and exit

Finally, format the partition with the ext3 filesystem:
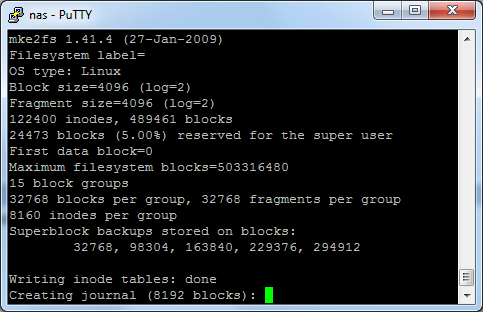
mke2fs -j /dev/sdv1

Now the partion is formatted and it can be mounted again:
mount /dev/sdv1
The USB drive is now ready for use 🙂

Starting, restarting and stopping daemons in Linux

Daemon services, or just daemons, are started at boot time. They are roughly equivalent to services in the Windows world.
To see which daemons are available on a system, do an

ls -l /etc/init.d/

Every script in that directory represents a daemon, which can be started, restarted and stopped manually using the following syntax:

/etc/init.d/<daemon name> start | restart | stop

If, for example, I wanted to restart an nzb-get daemon due to changes in its configuration files, I would type

/etc/init.d/nzb-get.sh restart

After issuing the command, the daemon will usually print some lines to the terminal indicating what it is doing, e.g.: “Starting NZB-Get Daemon” or “Shutting Down“.

If you want to make sure whether a daemon is running or not, you can grep for its name in the list of running processes. If I wanted to see if the nzb-get daemon was really started, I could do the following grep:

ps -aux | grep nzb

If the daemon is running, this will produce a result like:

8148 admin 2456 S /opt/bin/nzbget --daemon
8355 admin 564 S grep nzb

The first line is the daemon. Notice the “–daemon” at the end of the line. The second line is the grep process we just ran to find the daemon.